So far we've built the Etch-A-Snap and processed an image to produce a 1 bit image. In this part we’ll look at how to take this image and generate the draw instructions for the plotter.
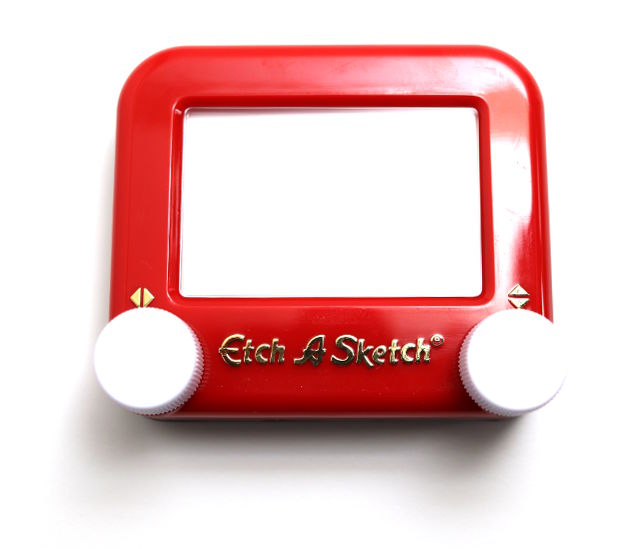
Etch-A-Sketch is a very simple 2D plotter which is limited to drawing a single unbroken line, of a single thickness on a semi-reflective screen. The dark lines are actually ‘gaps’ in a reflective powder coating which sticks to the reverse side of the glass screen. Lines are produced by scraping this powder off with a little nubbin which is moved around on wires.

The plotter is controlled using two input wheels. Rotating the left hand wheel moves the plotter point left and right (CCW and CW respectively), while the right hand wheel moves the plot point up and down (CCW and CW respectively).

There are no other controls on the standard Etch-a-Sketch. To clear the screen you flip the Etch-A-Sketch over and shake it gently — this coats the reflective powder back onto the reverse of the screen, making it appear silver-ish again. On the Etch-A-Snap this is detected by a tilt-switch which resets the camera to “ready to take” mode.
Motor control
The Etch-A-Sketch wheels are driving using two 5V 28BYJ-48 motors, driven using ULN2003 ICs. The motors are powered from 4xAA batteries (6V). Motor control is handled via gpiozero powering GPIO pins as simple digital outputs (.on and .off states). To provide more torque adjacent coils are paired and turned on and off together — doubling the current available to turn the shaft.
from gpiozero import OutputDevice, LED

lr1 = OutputDevice(26)
lr2 = OutputDevice(19)
lr3 = OutputDevice(13)
lr4 = OutputDevice(6)

lr_steps = [
    (lr1.on,  lr2.on,  lr3.off, lr4.off),
    (lr1.off, lr2.on,  lr3.on,  lr4.off),
    (lr1.off, lr2.off, lr3.on,  lr4.on),
    (lr1.on,  lr2.off, lr3.off, lr4.on),
]

lr = 1
The above shows the step sequence for the left-right wheel, but the up-down pair are identical aside for the GPIO pins. Each wheel must track its own position in the step iteration (here lr for left-right, or ud for up-down) so the correct coils are activated in order, even when reversing.
Stepping
Storing the pin state methods .on and .off in this way makes it nice and simple to perform a single step — we can iterate the row and call each in turn.
def step(steps, i):
    for p in steps[i]:
        p()
The process for stepping in any given direction is as follows —
- increment or decrement the step counter for that axis (
lrorud) - constrain this to the the range 0-3 (4 steps)
- output the
.onand.offstates for that step to GPIO
The equivalent code for the left() step is shown below.
def left():
    global lr
    lr += 1
    if lr == 4:
        lr = 0
    step(lr_steps, lr)
The other step directions all follow the same pattern. Notice that left_is decrement, _right is increment, up is decrement and down is increment — the reverse to what you might expect. This is because there are two cogs, the motor turning clockwise turns the Etch-A-Sketch wheel counter-clockwise.
To support developers in [[ countryRegion ]] I give a [[ localizedDiscount[couponCode] ]]% discount on all books and courses.
[[ activeDiscount.description ]] I'm giving a [[ activeDiscount.discount ]]% discount on all books and courses.
Stopping
There are two types of ‘stop’ states for the plotter. The first is “virtual” and is a no-op, simply added for clarity in the code. The GPIO states are left as-is meaning the stepper coils remain energised, holding the wheel in place. The Etch-A-Sketch wheels are stiff, but testing I found that leaving the step active (and coils energised) improved accuracy a bit particularly when back-tracking.
def stop():
    pass
However, it’s still necessary to be able to actually switch off the driver after plotting to avoid wasting battery power. For this case there are two stop_ methods which turn off all GPIOs for the given direction, de-energising all coils for that motor.
def stop_lr():
    for p in [lr1, lr2, lr3, lr4]:
        p.off()
The plotter driver
The plotter driver is the interface between the graph output (a series of cardinal direction movements) and the motor stepper commands already shown. The graphing code initially only output -1…+1 movements, however the driver was implemented to allow larger steps to simplify working with it and testing. This proved useful later when implementing the subgraph-connector code, as it allows long-distance links without intermediate steps (which would force them to be drawn by adding nodes).
The driver uses a queue, onto which moves are pushed. These are retrieved by the plotter which runs in a separate thread, and executed at a consistent rate. This rate was selected to be as fast as possible while being consistently reliable with the current power supply, due to the potential for things to go very wrong if steps are skipped (drawing off the screen and breaking the mechanism). I found a rate of 1 step every 0.001 seconds was reliable.
MIN_STEP_WAIT = 0.001
PLOTTER_SCALE = 25
REVERSE_TRACKING_STEPS = 100
The plotter scale is the number of individual stepper steps that are required to move across the display by 1 pixel. By multiplying PLOTTER_SCALE by MIN_STEP_WAIT we get the time taken to draw a single pixel, of 0.025 seconds, or 40 pixels/second.
The mechanism of the Etch-A-Sketch (and the Etch-A-Snap) has a bit of slack which is particularly noticeable when changing direction. To account for this slack we need to insert tracking steps when changing direction on either axis (up->down, left->right and vice versa). The number of REVERSE_TRACKING_STEPS required was calculated to be around 100, or approximately 4 pixels. In fiddly images these tracking adjustments can add quite a lot to the drawing time.
The queue
The queue is a standard Python queue instance.
import queue

# The queue that holds our list of moves in terms of MOVE_MAP (individual steps).
movequeue = queue.Queue()
The instructions for the plotter are calculated and pushed onto the queue by the enqueue function. This accepts a generator of moves in the format output by the calcuation_moves method, e.g. (-1, 0), (-4, -4), (1, 1). These macro steps are converted into a series of single steps e.g. (-1, 0), (-1, -1), (-1, -1), (-1, -1), (-1, -1), (1, 1) and sent to the plotter.
Most movements from the drawing code at sent as individual steps anyway, apart from the linker lines.
Importantly the enqueue function handles the addition of tracking steps neccessary when the stepper motors are changing direction, e.g. a move down following a move up. To do this enqueue keeps track of previous left-right and up-down state
and then inserts additional steps when a change is detected, ignoring stops (which do not require tracking).
def enqueue(moves):
"""
Iterate a generator of moves, converting macro moves (+4, +4) to a series of individual
steps and pushing these onto the plotter queue (+1, +1) x 4.
"""
# Returning to home will always put the wheels in this state.
lr, prev_lr = 'left', 'left'
ud, prev_ud = 'up', 'up'
for diff_x, diff_y in moves:
# Select the lr/ud based on magnitude. For 0, keep current so we
# can easily detect changes in direction across stoppages for tracking.
lr = {-1: 'left', +1: 'right', 0: lr}[sign(diff_x)]
ud = {-1: 'up', +1: 'down', 0: ud}[sign(diff_y)]
# Apply tracking correction for changes in direction.
if (lr != prev_lr) or (ud != prev_ud):
tracking = (
'track',
lr if (lr != prev_lr) else 'stop',
ud if (ud != prev_ud) else 'stop',
)
for n in range(REVERSE_TRACKING_STEPS):
movequeue.put(tracking)
# Perform move.
a_diff_x = abs(diff_x)
a_diff_y = abs(diff_y)
if a_diff_x and a_diff_y:
# We can cheat at abit, as we only have 45' angles, i.e. a_diff_x == a_diff_y.
for _ in range(a_diff_x):
movequeue.put(('move', lr, ud))
elif not a_diff_y:
for _ in range(a_diff_x):
movequeue.put(('move', lr, 'stop'))
elif not a_diff_x:
for _ in range(a_diff_y):
movequeue.put(('move', 'stop', ud))
prev_lr, prev_ud = lr, ud
# Send stop all directions (unheld).
movequeue.put(('home', 'stop_lr', 'stop_ud'))
# Wait for the queue to empty.
while movequeue.qsize():
time.sleep(1)
def sign(n):
"""
Return -1 for negative numbers, +1 for positive or 0 for zero.
"""
if n == 0: return 0
return n / abs(n)
Moves are pushed onto the queue as a tuple of type, leftright, updown, where type can be one of "move", "track" or "home". The "move" instructions are those which actually move the plotter, "track" are inserted tracking steps for changes of direction and "home" is a final instruction used to switch off the steppers once the plotter has returned to (0, 0). These are only used to provide context to the status message output by the plot function.
The leftright and updown values contain the actual instructions — e.g. the value of leftright can be "left", "right" or "stop". These are used to call the relevant function in the plot code. The "stop" instructions are actually no-ops, intended to hold the stepper at the current place. Only "stop_lr" and "stop_ud" actually turn off the stepper coils.
The enqueue interface makes it easy to draw simple shapes, e.g a 10 pixel box.
plotter.enqueue([(10, 0), (0, 10), (-10, 0), (0, -10)])
In the initial shader-fill approach this method wasn't neccessary for drawing camera pictures. However the later addition of connecting bridges uses single-edges of >1 pixel in length and so requires it.
The enqueue code currently only supports 45 degree angles so there is no support for sweeping curves or other vector graphics. However, curves can be reproduced pixel by pixel from input images.
The plotter
The final stage in controlling the steppers is to take the micro step commands ('left', 'stop'), ('left', 'up'), ('stop', 'down') and trigger the stepper control functions. The strings passed as commands map directly through MOVE_MAP to the relevant function, so we can use these to trigger the steps, e.g. MOVE_MAP[lr]().
def plot():
    """
    Pull an individual move off the queue and perform it, at most
    every MIN_STEP_WAIT seconds.
    """
    move_n = 0

    while True:

        # Retrieve a move tuple from the queue, and execute.
        action, lr, ud = movequeue.get()
        move_n += 1

        for n in range(PLOTTER_SCALE):
            # Check time
            now = time.time()

            MOVE_MAP[lr]()
            MOVE_MAP[ud]()

            # Wait if the get wasn't already too long.
            while time.time() < now + MIN_STEP_WAIT:
                time.sleep(0.001)

            ), end='\r')
The plot() is run in a separate thread at startup and runs continuously until shutdown. Any moves pushed onto the queue will be retrieved and executed every MIN_STEP_WAIT seconds.
import threading
thread = threading.Thread(target=plot, daemon=True)
thread.start()
The MIN_STEP_WAIT value was reached through trial and error. It's definitely possible to push it faster, but slower steps make it less error prone. Dropping a single step will cause the stepper to fall out of sync and drop more, screwing with the scale/positioning of the subsequent parts of the image.
What's next
This is the end of the project write-up, but there are still a few things to check out.
- The full code is available on Github, along with a Jupyter notebook explaining the image and graph processing.
- You can download the STL files for 3D printing, or edit the model on TinkerCad directly.
- The circuit Fritzing file is also available.
The first part of this write-up has a bunch of Etch-A-Snap demo images.
Create GUI Applications with Python & Qt6 by Martin Fitzpatrick — (PySide6 Edition) The hands-on guide to making apps with Python — Over 10,000 copies sold!

